
Part 1 – Traditional wooden boats
By Paul Stock
This article is part 1 of 2 parts.
Welcome to this condensed summary of the history of New Zealand wooden boat structures in New Zealand (close to the actual truth but it is acknowledged that there may be some who see things differently and that is fine).
It is intended for anyone interested in wooden boats, especially surveyors and owners intending buying one.
Let’s get started. Which of the following statements is true?
- Wooden boats hulls tend to move slightly (bend/twist/expand/contract) that causes the planking joins to be visible
- Wooden boats need a lot of maintenance
- Wooden boats rot
- Wooden boats shouldn’t be painted with hard marine paints
- A wooden boat is a boat made of wood.
I would say that the only the last statement is true. The answer to the others is: it depends. That’s because there are many structural ways to build a wooden boat.
The number of wood boats of any kind being built is reducing along with the boatbuilders who build or have built them. As knowledge fades so does good available information about the boats for those keen on buying, using, preserving them or for younger boatbuilders and surveyors tasked with assessing or repairing these boats.
Wooden boat types can be divided into four broad categories. Most wooden boats will fit – more or less – into one of the following:
- Traditional vessels such as Pacific fishing and voyaging craft (outside of scope for this article but we’d like to do an article on these fascinating craft in future).
- Traditional construction without glue
- Glued wooden construction
- Glued and encapsulated wooden construction (a form of composite construction)
Traditional wood construction without glue
These vessels are most boats built in New Zealand up till the mid 1900s (say late 1950s).
It is useful to know a bit about these now virtually archaic boats to understand the evolution of wooden vessel constructions. Traditional wooden boats formed the foundation for evolution to glued timber, then to epoxy sheathed and eventually composite timber cored vessels. What follows I hope explains the quantum differences between the different wooden boats. What is normal in terms of maintenance, longevity, weight, finish on a traditional vessel is very different to normal on a glued wooden epoxy encapsulated vessel.
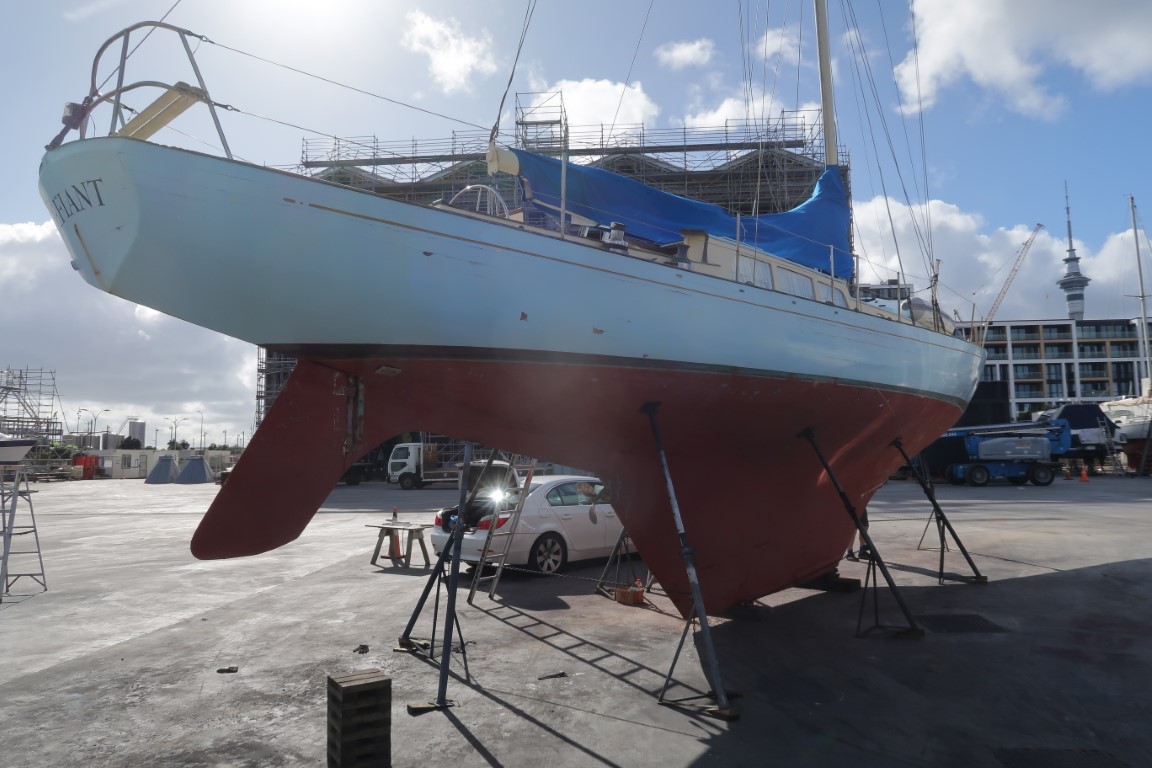
There are very few new traditionally built vessels launched these days, but there are the occasional exceptions such as a new 14.5m traditionally built fishing trawler that was launched by Stark Bros. in Lyttleton in 2021.
Traditional planking
Planking was mainly fore and aft oriented single skin planked although some were built using multi skin including diagonals sometimes with felt between the layers and combinations of longitudinal and diagonal planking were not uncommon. The late 1800s and early 1900s pleasure sailing vessels by Logan and Bailey were often built this way and I’d say that they would have been stronger and more durable for a given planking thickness but also more time intensive and expensive to build.
Kauri was the most often timber used for planking in New Zealand but many other softer and harder straight grain timbers have been used.
Planking type can be:
- Carvel; caulked or tight seam or with seam battens or splined,
- Multi skin with combinations of diagonals and longitudinal planking
- Clinker (overlapping like weather boards, mostly used for dinghies)
Hull component sizes and shapes were determined by “lofting” the process of re drawing the hull lines full size and by reference to a list of scantlings provided by the designer. Scantlings specify the siding and mouldings (width and height) of each part.
Structural requirements and scantlings
Scantling sizes would often be determined by the boatbuilders from experience, especially for pleasure vessels. As there were many more small fishing boats around the coast than there are now with most probably wooden, the Marine Department of New Zealand published “Requirements for the Construction of Wooden Inshore Fishing Boats” which included guidelines for construction and tables of required scantlings sizes for fishing boats 6-14m.
Lofting
With the lofted information, the builder was able to build the backbone, consisting of the keel – (sometimes including the bolted ballast if a sailing yacht) and the stem, stern post and stern.
One reason for lofting was to correct any discrepancies on the drawing. For example, a 0.5mm variation on the drawing at a scale of 1:50 would be 50 x 0.5mm which is 25mm in full size. Using battens wrapped around temporary nails tapped into the lofting floor at or near the designer supplied offsets, the waterlines, buttock lines, diagonal lines and sections were reproduced full size on a white painted floor so that all the lines were “fair”.
The second reason for lofting was so planking thickness deductions and bevels could be determined and applied to vessel components as required for frames bulkheads, stem, stern, and bevels for the rabbet lines (where the first plank joins the keel) etc.
One of the pinnacle skills of the craft of lofting that apprentices used to be tested on in New Zealand as recently as the early 2000s was manually, on the loft floor “develop” full size the shape and edge bevels of a raked and curved transom (stern).
Lofting skills are still used on glued timber vessels but to a much lesser extent as computerisation takes over and the conventions and terminology of traditional boatbuilding fade away.
Building process
Hulls were mainly built upright but there was a lot of innovation in New Zealand and there wasn’t “a” definitive way.
Usually, at least for carvel construction, the backbone/keel was laid on blocks, the hull moulds/frames were set up on the backbone typically braced to the boatshed roof structure.
Planking was then laid over the moulds and fastened using fasteners such as copper nails, roves, bolts and bronze screws. Iron fastenings were also sometimes used – especially for boats that may not have been expected to last that long – more likely on commercial. Planking would typically need to be steamed in the steam box to soften it up to bend around the hull. The timber would be left in the steam box until about right, then pulled out with gloves on and, no doubt with a degree of urgency, wrapped around and secured in position before it started to set in the bent shape.
Planking was typically followed by ribbing which again involved steaming and nailing/riveting of the ribs inside the hull before the timber cooled down and set. The ribs held the planks together. Temporary stringers (ribbands) could also be used over the temporary moulds to form steam bent frames.
After planking, the remainder of hull framing, bulkheads, gunwales, knees, engine bearers and mast steps, floors, deck framing/deck and interiors etc. were fitted.
Fastening and metals connected to planking and structural timbers
The fastenings on these vessels were crucial. Without nails, bolts and screws the planking will come apart.
Some of the issues found on aged vessels related to fastenings include “nail sickness” that degrades wood surrounding fastenings. The salt saturated wood reacts with the fastenings to cause a type of electro chemical timber degradation. Electrochemical type degradation is also sometimes seen around fittings such as stern and rudder glands that are surrounded by wet salt saturated timer.
Any kind of “bonding” together of metal fittings using conductors (wire or strap), especially bonding of dissimilar metals for electrical or cathodic purposes tends to cause electrochemical activity around metal fittings that can quite possibly cause degradation and damage to the timber surrounding the bonded metal fittings. Anodic metals are also very vulnerable.
The impact on timber of bonded metal fittings can be very significant, stripping the cellulose and strength completely out of the timber. From a structural perspective it is best not to bond metal fittings on wooden or GRP boats (all wooden boats as the wood core on composite wood boats can get wet around glands etc. despite good intentions of it staying dry forever).
Metals should be very durable so that they do not need to be cathodically protected such as good bronzes like silicone bronzes, copper, and monel (rarely seen now but good). Copper can stretch and while a noble metal, its condition can be difficult to assess when aged.
Hull tightness
When new, traditional boats were generally “tight”. Carvel planked planking seams were caulked with cotton. Nail heads tightly embedded in the timber. Cotton wrapped around the bolt heads helped seal them. Any moisture absorbed by the dry planking would swell the timber causing “take up” of the planking to make the hull tight (although traditional shaft and rudder glands are supposed to drip so a dry bilge is hard to achieve).
Carvel hull finish
When carvel planked hulls are new and have been cleaned off and faired, slight surface variation usually gives away the planking seams visibly. As they age, it’s normal for movement of planking to become visible, more so above the waterline. Heavily built vessels and commercial hardwood planked vessels are less subject to movement and dark coloured hulls more likely to move more than light.
Flexible single pot (air drying) oil paint is generally used to paint hulls with repaint caried out relatively frequently, often by brush/roller.
Timber selection and properties
Timbers were selected to match the component’s structural requirements. Many different timbers species were used, like: Spotted Gum, Tanekaha and similar type harder woods were used for ribs and bent frames. Pohutukawa was a good choice for knees, especially as the gnarly shapes could often be matched to the required grain direction curving around the knee (known as grown knees). Kauri was the preferred choice for durable straight grain beams, decking framing and general light/strong/durable applications. In fact, kauri was so versatile it wasn’t uncommon for almost all timber on a vessel to be kauri.
As structural timbers on these boats were often exposed to unrelenting wet conditions over the lifespan of the vessel, durability was a key attribute. Generally, only heartwood was used but perhaps not the deep heart which would be likely to be more brittle than mid heart. Tanalising treatments became available after the main carvel planked era so previously non-durable woods like pine can sometimes be used for repairs.
Timber properties can be partly predicted based on the species, parts of the tree that the timber is from (such as sap and heartwoods), and grain direction in relation to the face (1/4 sawn or flat sawn). In non-laminated timber there is a significant difference in tendency for timber to warp, twist or cup based on how the logs have been cut. Quarter sawn timber is far superior and more expensive (areas where quarter sawn would be used include decking and planking). The way the timber is sawn is much less important in glued timber as when several layers are glued the grain of pieces can be arranged to negate movement.
Dry timber is stiffer and likely stronger than wet timber and timber is by nature inconsistent. Timber in large scantling sizes can exert great power if it gets wet and swells.
Worm and airborne boring insects
Another important consideration that still applies to modern timber constructions is worm found in the sea such as toredo worm (big holes) and gribble holes (little holes). These worms can be damaging. You can see worm holes on pieces of drift wood and unprotected timber in the sea. And it often gets in to the keel battens on the bottom of older launches keels. These worms can get started in any craters in hull planking and it is important to keep the protective coating in good condition as many traditional boats are often only protected with antifouling. Some timber species are more resistant to worm than others.
Airborne insects such as borer and termites can also get into timber and termites sometimes find their way into boats in the tropics but there have also had cases of termite damage to planking on overseas cruising boats. Small holes in timber and dust-like residue near the holes known as frass can be indicative of termites carried into New Zealand. Borer isn’t common in boats but could be in timber used to build a boat.
Degradation of traditional timber hulls
Structural degradation factors include:
- Fastening heads pulling into the timber with the vessel’s movement during use,
- Moisture ingress and timber expansion and contraction from heating and cooling.
- Copper stretching.
- Nail sickness and electrochemical decay as mentioned previously,
- Hull sides may also dry out with exposure to sun and heat especially if kept on a marina where one side is north facing all the time or hauled out of the water.
- Worm or airborne insect damage
- Abrasion and impact damage – such as commercial boats
The more the vessel moves over time, the looser fastenings and planking become. Boats become wetter – in the bilge and structure, movement increases. If hauled out and allowed to dry, it is not unusual for them to sink when re launched!
With additional movement some structural timbers become more liable to break, such as ribs on the turn of the bilge where they have been steam bent into shape and the amount of curvature is greatest. If there is unexplained planking movement, always check for broken ribs internally. If one rib breaks, others adjacent will be more likely to break too. Ribs can be “sistered” (extra ribs fitted alongside existing) and refastening or tightening of fastenings can help.
Eventually, carvel vessels are likely to become too wet, with too much movement to the extent that cost of repair exceeds vessel value. These vessels are often abandoned, left languishing on moorings or on the hard, on the side of roads or in boat yards.
Degradation of decks
Planked and caulked bare decks wear down over the years. Water fresh and raw (sea or lake) tends to find its way through planked decking and sometimes into the upper hull planking and deck framing. Sometimes plywood is laid over the decks to prevent wear and prevent/reduce deck leaks.
Timber decay (rot) is not unlikely from deck leaks – usually in areas where fresh water saturation in deck areas or their framing may have occurred.
Ways to extend the life of traditional timber vessels
There are ways that the effects of degradation can be reversed or mitigated. The following options may be used but need to be considered carefully in each case:
- Restricting the vessels operating area/risk.
- Overlaying worn decking with tanalised plywood.
- Filling in the seams and glassing over teak overlay decks that are well bonded but worn
- Recaulking with cotton or oakum caulking for really big gaps. Caulking is done using caulking irons and caulking mallet. Some success can be had using sealants but if possible, it is often best to use traditional methods on traditional craft.
- Major surgery of the hull can be achieved by drying out completely and gluing a couple of diagonals of timber over the hull followed by a GRP sheathing, or simply very heavily glass fibre sheathing the vessel to create a GRP shell outside of the existing hull. Diagonals first is preferred as a connector between the potentially damp aged existing planking and the hard fibre reinforced resin. A moisture tolerant glue such as resorcinol is more likely to adhere to damp timber than epoxy that is moisture intolerant.
These remediations can be expensive but are sometimes justified for particularly special vessels.
The time it takes for degradation to occur varies widely. Sturdy commercial vessels can last a very long time. Although they work hard, they were originally built strong and heavy sometimes with timbers like Australian hardwoods. These commercial vessels have also had to be maintained to a specified survey level and tend to be kept going to the maximum of their safe working life in order to maximise the economic return to their owners.
Traditionally built wooden commercial and pleasure boats have provided and continue to provide many owners long commercial or recreational service lives.