Author: admin

  • ABOUT FIBREGLASS BOATS

    ABOUT FIBREGLASS BOATS

    By Paul Stock 27/02/2026

    This article is one of a series of “in a nutshell” articles about boat constructions. It’s an opinion piece and hasn’t been fact checked. My version might not align with your version so although I’ve done my best to be true to the facts, it is a long time ago now (I was just starting at primary school when this all began) and I may not be 100% correct. Please feel free to get in touch if you have any feedback.

    The article is intended to be helpful to students, buyers, sellers and anyone interested in fibre reinforced boats. The following is covered:

    • The terminology and acronyms
    • Brief background of the adoption of GRP production boatbuilding in New Zealand
    • Production and materials of mainstream production boats (advanced composites will be covered in another article)
    • Deterioration and comments about the various constructions

    To stop you falling asleep (hopefully) this article is written as an approximate chronological account that introduces the concepts along the way.

    It starts when “fibreglass boats” started to be built in the 1970s (yes I know that there were some built before that but we’re going to run with the 70s as that is when the boom began).

    Terms and acronyms

    To begin with we need to define a fibreglass boat . There are many different names used to describe the same or overlapping things; For example, the following all describe fibreglass in some form or other:

    GRP (glass reinforced plastic)

    FRP (fibre reinforced plastic)

    FRC (fibre reinforced composite)

    “Fibreglass” is possibly the most widely used descriptor used for glass fibre reinforced  resin blend. The fibres are either pre impregnated in resin using one or more methods, “wet-out” by hand on the mould, or sprayed with resin from a gun. The resin must be catalysed by adding catalyst or hardener (depending on the type of resin).

    The resin/fibre blend or “laminate” can be applied or “processed” in a variety of ways that are discussed later in the article.

    Acronyms and terminology used in the industry may include ambiguous terms such as “composite” and “matrix” which can have multiple meanings. So the context of how the words are used is important. The following definitions are some of the more common ones used in this article. If you aren’t an industry person, you’ll probably need to refer back to these terms in order to understand them.

    Terms  Meaning
    Bog  Thickened resin made by adding substance like industrial talc  and/or other powers (sometimes called “extenders”) to resin to make a filler
    CADAcronym for computer aided design
    Catalyst  Usually methyl ethyl ketone peroxide, used to activate curing in polyester resin (always follow the manufacturers spec sheet)
    Chopped strand mat (CSM)Matting of random cut glass fibres that are held together with a glue called a “binder” that dissolves in resin when it is “wet out”.   CSM can also be created from a chopper gun machine. The gun has a rotating head with sharp blades that cuts up glass fibre known as “gunstock”. A chopper gun machine looks like a spray gun connected to a long mechanical arm. The chopper gun simultaneously chops gunstock into short lengths and distributes them into a resin stream that blows fibres and resin into a mould. This creates CSM is much the same result as hand laying CSM (if the operator is good at what they do).
    CompositeIn the fibreglass context, it means any construction made up of a resin and fibres. That extends to include high tech fibres like carbon fibre and advanced epoxy resins. “Composite” as a term can be confusing as vessels built with steel framing and wooden planking is/was also commonly referred to as composite construction.
    CoreMaterial used as a layer between an inner and outer resin/fibre layers (sometimes known as sandwich construction)
    Core matA soft matting used as a low cost core. The matting is wet out and laid in between an inner and outer GRP skin. The wetted matting introduces bulk to a laminate to stiffen it.
    CureCause the resin to go hard. Most resins used in FRP boatbuilding whether polyester or epoxy require the addition of a calalyst or hardener to initiate the hardening(curing). Advanced composite constructions often require a secondary post curing process at an elevated and controlled temperature to fully cure the resin to realise the intended laminate properties.
    Epoxy resinMore advanced resin than polyester using a different technology utilising a hardener rather than a catalyst. It is used in multiple applications and in different formulations, also used in paints and for adhesives. Applications include pre impregnated fibres and use with more advanced fibres than glass such as carbon fibres. Technically epoxy is: more resistant to degradation from flexingisn’t brittle like polyester can be modified with the use of different hardenerscan be formulated to be matched to the reinforcements used in a laminate has good waterproofing properties has good adhesion to most types of wood – as long as dry and suitably preparedHas gap filling properties if mixed with appropriate extenders (powders)
    FRCFibre Reinforced Composite. This covers the whole basket of technologies that use fibres and resin. Tends to be used for more advanced resin/fibre/core matrixs’
    Glassed  Has had glass fibre applied on or over, for example “a bulkhead is glassed in place”
    GRPGlass Reinforced Plastic. This generally means polyester reinforced glass fibres and may include “core” materials. This type of fibreglass accounts for almost all of the production boats that are the vast majority of the market. The resin (plastic) is normally polyester but could be vinyl ester or epoxy.
    Hand laid  Reinforcement is laid by hand into a mould and then wet out with resin
    Keel floors  Transverse beams that support the bottom structure on a sailing boat surrounding the keel
    LaminateThe combined “stack” or “lay up” of fibre layers, core, core bonding layers of adhesive etc. that form a finished panel.   The most basic “laminate” (that is the combined glass fibres and resin that make up a boat hull or deck or a toilet compartment or a shower etc) that was used in the beginning (early 1970s) is known as a “monolithic” or “solid glass” laminate, because the laminate is made up of layers that start with CSM, then roving, then alternate between layers of roving and CSM until an adequate skin thickness has been built up. The laminate is “rolled out” using grooved steel rollers between layers to compact the laminate and remove air in the laminate, and the CSM is like a bedding and bulking layer that ties the rovings together. CSM is a pretty weak way of building up strength compared to directional fibres (like rovings). Solid laminate is a bit of a misnomer because a thin monolithic laminate might be flimsy. So I’m going to call it “monolithic” to avoid confusion such as could occur if describing monolithic as solid glass in a survey report.   On a boat, the laminate specification often varies in different areas of the boat. For example, under the waterline or under the chines the laminate may be heavier and may be monolithic, whereas above the chine may be cored using a core material.
    MDFMedium density fibreboard – non waterproof board used for plugs and moulds that is hard and easy to finish and shape
    MonolithicA fibre laminate without core, made up solely with multiple layers of fibre. Sometimes called “solid glass” but in thin layers it may not seem “solid”.
    Mould/toolHighly finished component that is the shape of a finished product. It is covered in laminate then the laminate that has become the product is cured and “released” from the mould  
    Plug  Object made to the shape of a finished product used to make/take a mould from
    Polyester resin    The main resin used in production GRP boatbuilding. To make the resin cure it is usually catalysed using MEKP (methyl ethyl ketone peroxide) at between ¾ and 2% of the weight.
    Promotion  Adding of additives to resin to increase the speed of cure when the catalyst is added. Typically used in cold weather or to otherwise accelerate cure time.
    Release  Break the contact of a product and a mould in order to separate them
    Sandwich constructionCored fibreglass layup with an inner and outer skin like a sandwich. In a cheese sandwich the cheese is the core and the bread is the skins.
    Secondary bondedGluing of resin components that have already initially cured.  
    Stack Combination of fibres and core material layers making up a laminate. Laminate drawings tend to include thicknesses of each layer – may also be called “layup”.
    Stitched fabrics  More advanced reinforcements than the traditional woven rovings and chopped strand matt, that have directional fibres stitched together to hold them in place.
    Vinylester resinA superior resin compared to polyester. In layman’s terms it is chemically halfway between polyester resin and epoxy resin. A catalyst is used to activate the cure in the same way as polyester resin. Vinylester resin is often used in below waterline laminates adjacent to the gelcoat as a barrier layer because of its excellent water resistance, reducing the chances of permeation through the laminate that can cause osmosis. It is also excellent for bonding to aged polyester resin such as in repairs and for its chemical compatibility with both polyester and epoxy resin.
    Woven rovings  A basic non stitched weave of under and over matting of thick strands available in different weights

    History

    Fibreglass boats exploded on to the New Zealand market in the 1970s covering all sizes of craft from kayaks to trailer boats to larger launches, multihulls and keel boats.

    Compared to glued and sealed wood construction, fibreglass was a different alternative and competitor, emerging at a similar time.    

    Advantages included:

    • Efficiency: Fibreglass boats were made from moulds. Once a mould for a boat hull and decks was made multiple vessels could be made in a fraction of the time required for a wood boat.
    • Durability: Laminates have proven to be quite tough compared to timber because of the higher laminate density than a typical wood or sheathed wood core boat of the era.
    • Finish: The gelcoat finish – from highly polished waxed moulds – was excellent, shiny and fair, compared to the single pack, often hand painted finishes of wooden boats that the market was used to. And the hard gelcoat surface has, over time, been found to have quite good abrasion resistance.
    • Availability: Faster build and production set up of builders enabled much shorter delivery time than glued wooden boats.
    • Skills needed: Many of the tasks were able to be standardised and done by relatively low skill workers and/or workers able to be trained quickly compared to the lengthy training periods of craftsperson wooden boatbuilders
    • Price: Less expensive than the same design built in glued timber
    • Standardisation: Potentially one of many sisterships with standardised build quality and better-known resale values

    Many of the 1970s and 1980s fibreglass boats were ordered as “hull and decks”. Hull and decks packages usually had windows fitted, possibly the engine, and were a weathertight shell, enabling the DIY home builders to complete the interior, plumbing, and engineering themselves, potentially saving money.

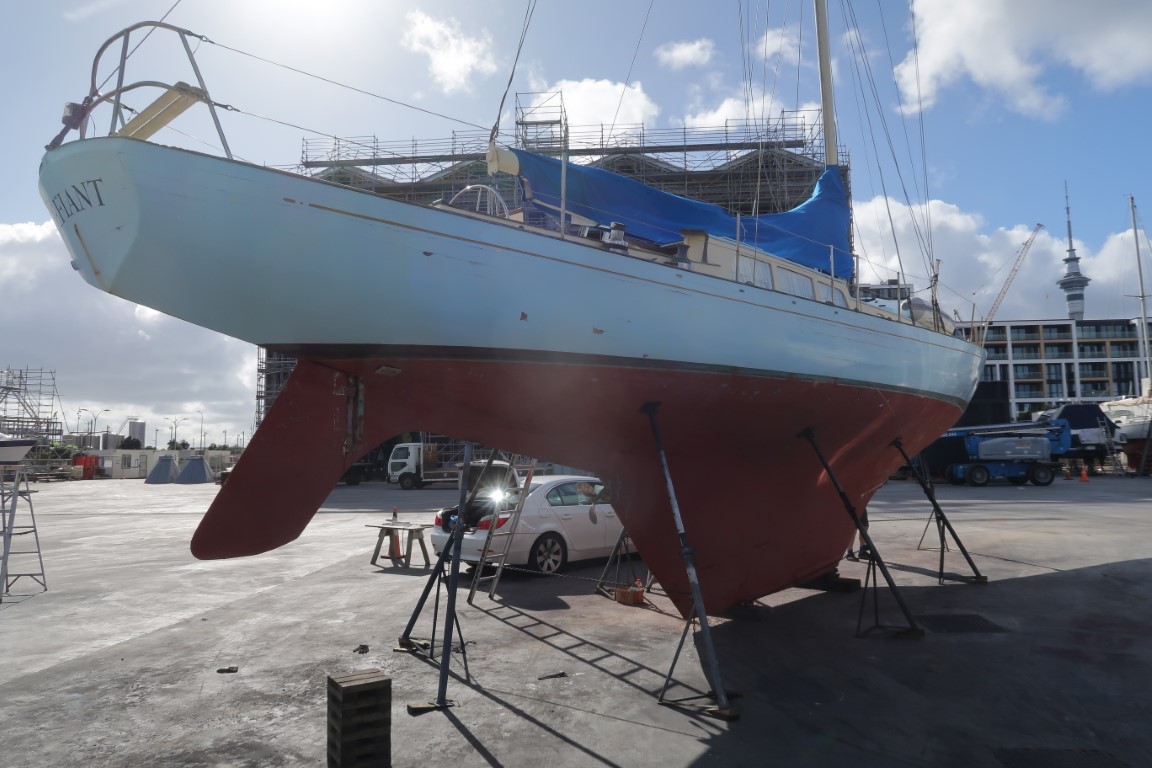
    Some readers may remember the hulls of large keel boats and launches parked on lawns or driveways of almost every second street. Those were the days when you could buy a hull and decks, finish it yourself using real intelligence and effort, and sell it at a tidy profit. And there was a boatbuilder in nearly every industrial area.

    Moulds

    Regardless of the laminate specification, a mould (sometimes known as a “tool” or “tooling”) will normally be required. I say normally because panel type GRP products that have foam or balsa core that can be used like sheets of plywood to fabricate a boat, but these are not used for mainstream fibreglass production boats.

    A mould can be in male or female form hull or deck. Production boats are almost always made from female GRP moulds so the moulded surfaces are the reverse of the actual hull or deck.

    To make a hull mould you make a plug the same shape as you want the boat. It was common to build a prototype model hull out of wood epoxy, finish the exterior to a high standard, then polish and carefully wax the surface to enable release of the cured mould. The hull mould is then laminated in heavy fibreglass (for stability) over the “plug”. The mould was then released from the hull,  leaving the hull to be finished and launched.

    GRP moulds were/are made from the same type of laminate as actual boats, but  heavier and stiffened using a steel framework around the mould, and usually set up on gimballing rolling frames, that enable the mould to be swung side to side to enable access during lay up.

    Tooling gelcoat is used on moulds. It is usually harder than normal gelcoat to withstand multiple releases of product from the mould.

    When I was an apprentice in the mid 1980s we took the hull mould of a well-known design from the strip planked cedar core prototype hull. The wax on the hull was either inadequate, not allowed to cure or not compatible with the hull mould tooling gelcoat or hull paint that was applied on to it. This resulted in what is known in the industry as a “stick up”. The mould was intended to release from the plug silently and easily with the slightest of persuasion and air injection. Instead, after an agonising separation job of banging, wedging and injecting with compressed air it finally came away leaving massive sheets of what I believe was Epiglass Reaction Lacquer paint, stuck like shit to a blanket, another industry term as they say in the trade, to the inside of the mould and great patches of bare fibre on the hull. An army of us then spent days with acrylic scrapers. Chipping paint off the mould. And then wet sanding and polishing the mould.

    One detail aspect of the hull and deck moulds that has to be designed is the stern and gunwale join details that will require a flange or overlap detail that enables strength in the hull/deck connection and minimal finishing, the detail of which is a bit beyond this article.

    Deck moulds were very time consuming to make. Their plugs were typically made out of MDF as single use plugs with heavy GRP moulds take off. For shorter or single custom boats, a finished mould would often be made from MDF.

    Non skid, hatch detailing and many other details are usually required to be incorporated into the plug/mould. Back in the 1980s details would be tweaked and sometimes decided on the job, whereas it is more likely these days for a 3D CAD team to draw the deck in software, to enable mechanised cutting of detailed components. And the plug material is more likely to be a synthetic board. Slight tweaks and modifications are still to be expected on the plug before the final moulding is taken from the plug.

    Moulds were maintained by fine polishing and waxing to ensure reliable release. Periodically moulds would be stripped of all wax, re polished and sealed and waxed.

    Gelcoats

    Gelcoat is the first layer that is applied into a mould when making a product. It is brushed or sprayed thickly into the mould. After curing for a limited time (so that a chemical bond of the glass fibres to the gelcoat is maintained), glass fibres are laid up progressively in stages to build up the shell thickness to the desired specification. The gelcoat used to make products from female hull and deck moulds is unwaxed gelcoat. When applied to a mould surface the gelcoat inherits some wax from the mould surface which results in a shiny, glossy, waxy finish of the product when released from the mould.

    Gelcoat is essentially a pigmented polyester resin. Early boats were painted as polyester resin is quite porous, but it was found accidentally that pigmented resin (gelcoat) gave good service as it was hard.

    Gelcoat must be applied thickly in manufacture to prevent styrene attack/alligators. It also shrinks a lot when curing that leaves the surface in a sort of tensioned state. That is why spider/crazy cracking occurs easily on gelcoat.

    For surveys the spider cracking is an indicator of flex which may or may not be indicative of a damage event. If there is repetitive flex in polyester laminates “micro cracking” tends to occur that results in softening of the laminate. Cracked gelcoat or microcracked laminates are likely to absorb moisture in exposed laminates.

    The porosity of gelcoat means that:

    • It’s a good idea to keep it waxed for protective reasons
    • If a paint on gelcoat repair is done it is not going to stay matched for long as the paint and gelcoat are totally different materials (will fade differently, maintain different gloss etc)
    • A GRP vessel with faded gelcoat will have a superior protective coating if repainted with a modern 2 pack paint system than when the boat was new – though possibly not as hard as the original gelcoat

    It is also worth noting that if spider/crazy cracking in gelcoat is painted over, the cracks will come show through the paint.

    Flowcoat

    Gelcoat that is brushed-on like a paint and allowed to dry used in lockers or to finish internal structure must either have wax added to it, to prevent it from remaining sticky on the surface, or be pre waxed. Pre waxed gelcoat is often known as flow coat. If you were to lay up laminate onto it without grinding the gelcoat the fibres would probably not stick. 
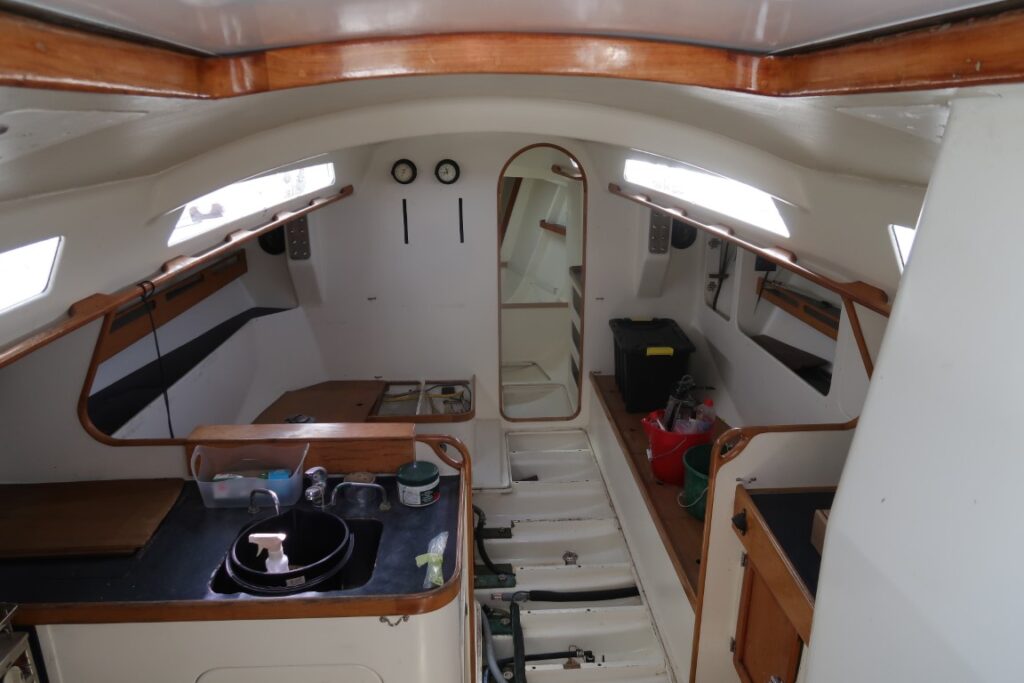
    Hull and deck skins

    The New Zealand boats of all sizes were/are generally strongly made. The skins of the very early ones were mainly monolithic (without core). Preparation for “lay up” included pre cutting the fibres of chopped strand mat and woven rovings, then laying fibres into the mould, wetting out with resin and consolidating the fibres to remove air by rolling out using a grooved metal roller. This type of lay up is often described as “hand laid” probably the most basic type and still commonly used. Other options include chopper gun sprayed chopped fibres that looks like CSM. Fibres that are chopped up and spray applicated by a chopper gun machine use reels of fibre called “gun stock”.

    Many traditional yards viewed the sticky and fumy fibreglass materials almost with disdain others had a go at transitioning to GRP, some successfully. One of the new things to discover was mixing resins and glues. Polyester, vinylester and epoxies, despite their differing chemistries, all develop heat when they cure. This is due to the curing reaction (exotherm). The larger the volume of mixed resin/glue, the more heat and bubbling. And the more pungent probably poisonous fumes and probable fire. For that reason, you should only mix just enough that you can spread out or use in a short space of time, or you should spread it out in a shallow wide container, or use a slow hardener, less promoted resin, or reduce catalyst to a minimum.

    Don’t do what one yard did; mixed their first batch following all mixing ratios, a good quantity. Then it was smoko. Imagine the effects of the exotherm when they returned!

    Hulls below waterline/osmosis

    Early hulls were often affected by water permeating the below waterline skin of the boat and reacting with pockets of uncured resin in the laminate. The reaction of these areas caused pressure to build up and force the products of the reaction – a vinegary “osmotic” fluid of brown colour – though the hull skin causing blisters (osmosis). The blisters may  burst. Raised early-stage pimples or humps in the skin may be signs of pending osmosis but aren’t always. Other relatively harmless defects or issues may also look like osmosis like solvent entrapment in antifouling. Scraping or wet sanding is recommended to verify depth of origin to diagnose osmosis (unless chronically obvious).

    The cause of osmosis has been attributed to many factors and in my opinion all of these are valid but may vary from case to case:

    • “Binder” in hand laid chopped stand matt (a soluble adhesive that holds the fibres together and dissolves when wet out with polyester resin)
    • Excessive air in the laminate
    • Dry laminate – not enough resin
    • Elevated moisture in the laminate
    • Incorrectly catalysed polyester resin
    • Low specification resin
    • Lack of an epoxy water barrier paint over the gelcoat prior to application of antifouling paint

    To repair affected laminates the hulls are usually planed (about 3 mm removed), dried and then the 3mm reinstated using vinylester resin reinforced laminate.

    To prevent osmosis, the following options are available. Most modern production boats use more than one of these options. But this may not always be the case especially if made with low quality control:

    • Barrier laminate of vinylester resin below the waterline or vinylester resin throughout
    • Epoxy primer/undercoat sealer before antifouling
    • Resin ratio correct and laminate rolled out well
    • Isophthalic resin instead of orthophthalic resin
    • Materials of known quality/specification (resins/fibres)

    Osmosis is much less prevalent in the 2020s than what it was 1970s/80s although still not uncommon, especially on older vessels.

    Hull and deck structural members (scantlings)

    Earlier GRP vessels often had internal scantlings and a backbone like a timber boat but internal kelson/hogs are seldom fitted on modern GRP boats.

    To strengthen and brace the hulls from deformation, plywood bulkheads are fitted on almost all boats. Early GRP boat bulkheads were typically attached with hand laid fibreglass CSM (chopped strand matt) tapes lapped half onto the bulkheads and half onto the hull skin usually using tapes on both sides of the bulkheads. Other significant structural members were often made of wood, glass sheathed and taped onto the surrounding hull.

    On yachts transverse timber keel floors and longitudinal blocking would be fitted in the vicinity of the keel and a mast step region which would be heavily glassed over and onto the hull skin (hand laid). Keel bolting would be either through massively reinforced monolithic skin between the floors or through the timber floors. On some yachts the keel floors would be hollow though or only have timber core through the mid section and considerable variation between yards existed.

    Keel floors hand built on a well built foam core FRP boat typical of early GRP and custom FRP boats

    On launches an external wooden keel for directional stability was often fitted and to enable slipping or drying out on a tidal grid, bolted through an internal timber encapsulated hog/keelson (these keels are often cut right down these days such as on boats like the Salthouse Corsairs). Timber engine bearers were usually sturdy, extending well fwd and sometimes to the stern. Like keel floors they were well glassed over but if surveying you may find some unbonded glass as polyester resin doesn’t adhere well to wood. The launches tended to be efficient, low or moderate deadrise hull configuration, some with warped bottoms that ran much more level and pushing far less ocean than the deep V keel less configurations now seen on most imports.

    To stiffen the monolithic hull skins on early boats “top hat stiffening” was usually used in conjunction with the floor grid/engine bearers. The idea was to make a non-structural shape (former) out of cheap non waterproof material like open cell foam (like surfboard foam) or cardboard tube cut in half. “Bog” (thickened polyester resin) was used to hold the foam or tube in place to form longitudinal stringers or ring frames. Then the formers were glassed over to create effective hollow fibreglass stiffeners.

    Hull/deck joins on the New Zealand boats tended to be very good with good sized bonded faying surfaces, fastenings and often glassed internally.

    Fibreglass opened up new opportunities for both industrious entrepreneurs, and wooden boatbuilders embracing the new material.

    Cores

    The problem with monolithic GRP is that it needs to be quite substantial and heavy to resist flex. And it takes lots of time and material to lay up thick monolithic layers. Flex tends to cause micro cracking and gelcoat star/crazy cracking.

    Cores solve the problem by providing a spacer to separate an inner and outer skin from each other. The increased bulk increases stiffness without adding much weight.

    Cores used on New Zealand production boats are typically either:

    • core mat which is a semi saturated matting that bulks up the thickness of the skin
    • end grain balsa or
    • closed cell PVC foam like Divinecell, Kledgecell, or Airex

    End grain balsa, although a wood core, is very common in GRP construction. End grain refers to the core being oriented so the grain runs from skin to skin when a core in a laminate. Think of a tree being sliced across the tree at 20mm intervals, then it is cut into blocks of about 40mm x 40mm (contoured) and held from falling apart by a light fabric scrim on one side. The core has next to no directional strength but has reasonable crushing resistance and resin penetrates well into the contours so it bonds okay even with polyester resin that doesn’t stick well to wood.

    End grain balsa has proven to be good in panels that have no penetrations like hull sides and flat deck panels. Unfortunately, the end grain was promoted in the 1980s as an advantage, partly because any water ingress would be isolated to the immediate surrounding area rather than wicking along the grain. In fact the water does manage to migrate sideways and rot the end grain balsa readily. So, it is really important not to have any penetrations into balsa cored panels such as screw holes for awnings and deck fittings or the balsa must be replaced with monolithic GRP or other durable core replacement like epoxy filler.

    Most modern production builders do a good job of replacing core with monolithic laminate such as in deck areas where hinges for deck hatches are fitted and anywhere where fittings are attached. But there are exceptions including one modern manufacturer that screws hinges and fittings onto thin skin foam core laminates which isn’t adequate.  

    Structural hull liners (matrix)

    For production efficiency, some New Zealand builders, in the 1980s began to use internal hull liners (known internationally as hull matrixes). These replace hand fitted timber framing and top hat stiffening and incorporate the structure in GRP mouldings. The mouldings have flanges that are glued onto the hull. Now, many if not most of the big international volume production builders use these matrix/liner mouldings.

    The problem in the 1980s was that the adhesives used did not always adhere well enough to the surface and faying surfaces were too small. Later adhesives have proven to be variable. Often the adhesive is thick and brittle and more like a bog than the type of adhesive you need in a mission critical area like the keel structure.  Issues with these matrix structures can include:

    • Slamming causing flange adhesion to fail
    • Vessel suffers grounding, matrix is overloaded and fractures/breaks away from hull. This is very common on fin keel boats where grounding forces the aft end of the keel upwards.
    • Vibration/misalignment on engine bearers causes glued in liner to come away

    With either of the above problems – that are regular on the imported production boats – it is very difficult to strongly re adhere the liner/matrix faying surfaces to the hull shell if they get damaged, especially if the surfaces have been exposed to oily bilge water or similar. Access is usually very difficult.

    The most common remedy is to grind away the loose shit, re bog it up with polyester and glass tape over the flanges onto the hull. This is a less-than-ideal option compared with – in the first place:

    • strongly gluing in separate keel floors and longitudinal   spacers, and
    • hand laying stitched double bias taping to additionally join the timber floor or glass web junction to the hull.

    In the event of a grounding the latter method is far more easily and reliably repaired.

    Some of the higher priced production vessels do not use liners/matrix, instead hand laying GRP webs/floors which are also more readily accessible for inspection.

    The 1990s and beyond

    In the 1990s, as the DIY boom tapered off, we started to see imported boats in New Zealand. It became less profitable to build yourself. By the 2000s many of the larger kiwi GRP boatbuilders had wound up their operations, or their businesses had failed due to increased competition from imported boats.

    An exception was trailer boats. I think that to this day there are more New  Zealand trailer boat builders than importers which is a credit to that industry and the suitability and quality of the boats for New Zealand conditions. Second hand resale values have been good – partly due to the NZ Marine CPC scheme. There are also, I believe, more boats per head of capita in New Zealand than any other county in the word.  

    As the imports, new and second hand flowed in, yacht and launch buyers and New Zealand boatbuilders have been exposed to larger international markets and the associated economies of scale.

    Vessel designs reflect their target markets and the conditions of those areas, the charter market being one of the main ones. Unsurprisingly, vessels from more rugged climates seem to be built more strongly than mass market vessels aimed at mainly fair weather areas. But of course, the prices for more rugged vessels or for smaller niche yards are higher now as they were prior to globalisation. 

    Another changing trend more recently is buyers acquiring large new vessels with no prior boating experience. Their expectations of comfort and luxury is not impacted by preconceived ideas of boating from being bought up in boats. And the luxury and comparably low price of imports have won over many experienced boaties embracing the new status quo.

    Modern imports and advanced composite constructions and processing

    Laminate strength can be varied in the laminate design by using directionally oriented stitched reinforcements (uni directional/biaxial/triaxial etc) and varying weight of fibre according to the differing strength requirements in different parts of the boat. Modern production boats often use these materials and appear to have been engineered, usually they are designed to meet standards such as ISO and are quality controlled to an extent, at least manufacturer declared as complaint. This enables their sale in their respective target communities such as EU, America or Australasia for example.

    Possible combinations of reinforcements, cores, resins and their processing methods are almost infinite. The range in cost and performance is wide, from fibreglass production boats, hand laid and sprayed up with chopper guns in low tech materials on the one hand as in this article; to Americas Cup boats, engineered, processed and crafted from advanced composites on the other.

    As with low tech GRP, the materials may be partly made up in preformed panels to avoid using moulds, or “laid up” on moulds from dry reinforcements that are then wet out. Moulds are generally required to provide the shape of the items being moulded – female or male. However the more advanced materials tend to use vacuum and pre impregnation to achieve higher fibre to resin ratios and better processing as appropriate to the higher material specifications and cost.

    The below table divides the range of construction types, from GRP to advanced composites the most common groupings. Note that the type of processing varies according to the materials used.

    Construction typeDescriptionType of boats
    Basic GRPlow cost, polyester resin, chopped strand matt laid or sprayed, woven fabric such as woven rovings, “bulking” cores such as core mat. End grain balsa cores, some foam cores. Laminate specifications may be based on experience rather than formally engineered. Rolled out manually to consolidate fibres. Made in open mouldsProduction boats of all kinds – hulls/decks typically at the value end of the market Most trailer boats Lower cost or non weight sensitive custom boats
    Slightly advanced GRP –Engineered laminates, possibly to ISO standards to meet EU or survey requirements, low cost polyester resin, chopped strand mat, use of quality assured cores such as closed cell PVC like divinecell or airex, or end grain balsa wood, use of quality assured directional woven structural “E glass” reinforcements such as double bias cloth, biaxial, triaxial etc. May use viny ester resin below waterline for moored boats. Sometimes models may be available with epoxy resin as an option rather than polyester. May be infused. May be hand rolled out in open moulds.Production boats of higher specification/cost Vessels required to meet engineered standards. Custom boats  
    FRCMore likely to be referred to as FRC than GRP Laminates are engineered, likely to a known standard, epoxy or vinylester laminating resin throughout. Engineered fibres such as S glass, Kevlar used, no chopped strand matt. Some use of carbon fibre in high load areas is likely. Likely to be vacuum bagged to consolidate the laminate or vacuum bagged and infused. Likely to use closed cell PVC foam cores. Elevated cure/post cure likely to be required.Hi performance weight sensitive production and custom boats   Possibly rudder stocks and spars
    Advanced FRCNot appropriate to be described as GRP. Advanced processing skills required. Likely to use epoxy laminating resins Likely to be all carbon fibre laminates Likely to use honeycomb cores like nomex or close cell PVC Fibres and core bonding are likely to be pre impregnated with resin to precise low resin/fibre ratios. Moulds likely to be carbon Advanced processing techniques used Laminates vacuum bagged or autoclave consolidated. Laminates likely to be heat cured and post cured at elevated temperatures  Highest performance and weight sensitivity, racing sail and power boats.   Masts/spars, rudder stocks, Structural rigging Americas Cup and Grand Prix performance sailing craft. Foiling craft


    Deterioration and aging of GRP structures

    Here is a list of just some of the common issues that we see in GRP structures.

    MicrocrackingSmall cracks in polyester resin caused by flexing, not really visible to the eye, often accompanied by or evidenced by: noticeable flex, spider/crazy cracks in the gelcoat and or softness in the laminate. Typical locations are: Around stanchion bases, boarding platform edges on launches, non cored areas on decks, flex in monolithic hull shells. Areas where cores have become disbonded from the skins leading to flex. May be found on hull skins of small craft, and likely on light racing dinghies – not noticeably visible.
    Spider/crazy cracks in gelcoatIndicator of flex which may or may not be indicative of a damage event. Cracked gelcoat or microcracked laminates are likely to absorb moisture in exposed laminates.
    Delamination from core, from wood (polyester)Anywhere where polyester resin is used to bond to wood. Often bulkhead taping. Bulkheads may be bolted on older craft to prevent disbonding
    Wet coreOccurs when there is water ingress into cored laminates such as: around anchor winches/bow lockers, where aftermarket fittings have been bolted through decks such as upholstery bases and clips, rod holders etc. Also screwed teak decks is a headline item for this problem. Wet core is more significant when the core is wood like balsa or plywoodWorse on decks Worse when core is open cell foam which can become saturated and/or turn to powderClosed cell PVC foam does not absorb moisture, but water can still be present in the contours and joins and can travel through foam core structures, especially where air pathways may remain from vacuuming or vacuum infusion  
    Hull deck joinsCracking usually from collision and often not visibly obvious, causes leaks behind internal linings, very common on imported vessels that have hull and decks bonded without internal taping or fastenings. Cracking from impact damage is also common around  the deck/stern join
    DelaminationCan occur from impacts, incorrectly manufactured laminates such as skins not properly bonded (especially from infusion or vacuum faults), from deformation of deck panels such as adjacent to berthing collisions at deck level, and boarding platforms. In hulls from logs in the water, slamming, fastened items such as tender frames, davits, helm chairs, major foot traffic causing flex in cored decks, chainplates causing lifting/flex in decks. Also delamination can be indicative of wet core causing the core to fail alongside the skin (soggy). In inspections/surveys, core delamination is usually easy to detect as the skins will be noticeably loose where tapped. Inter skin laminate delamination can be harder to pinpoint as tap responses normally vary around bulkheads and framing etc. Odd responses and skin flex is sometimes manufacturing issue with voids being possible in vacuumed/infused structures that can occur from leaks in the mould/bag leading to uneven and/or insufficient clamping/consolidation onto the mould surface.      
    Bad laminate designImpractical laminate design such as hulls with cored structure along the keel, very thin skins in core construction, low density cores, inadequate provision for attachment of skin/deck fittings  
    Cracking in hull skinImpacts, faulty manufacturing
    Flow coat flaking internallyNot a fault but looks dramatic, Flow coat does not adhere well and it flakes off on most older boats.
    Deck crackingMay be found around railing bases, anchor winches, davits, beam connections on catamarans, areas where stress concentrates such as cut out areas/hatches on deck mouldings, mast steps, chainplates (lifting chainplates).
    Cracked bulkheadsCan be caused by water damage, movement around stress areas such as cut outs in bulkheads/ mast steps, and may be related to hull damage.
    Cracked keel floor grid (matrix)Most typically from grounding, the flanges bonded to the hull skin crack in or alongside the adhesive when the yacht grounds. The back of the keel is typically the most visibly cracked area, the front also likely to be torn away.
    Failing gelcoatFaded, failing (cracking/crazing), worn down (high traffic areas). The best fix is usually to paint with a 2 pack marine paint system.
  • ABOUT WOODEN BOATS 2 – click to read

    ABOUT WOODEN BOATS 2 – click to read

    Part 2 Glued Wooden Boats

    From about the 1950s glues were used in boatbuilding – probably before too. Early examples included plywood and glued multi skin hull constructions. In England, Uffa Fox made multi skinned sailing dinghy hulls built upside down using thin veneers laid diagonally onto moulds. In New Zealand, Des Townson and Mosquito craft built multi skin moulded dinghies over moulds.

    Considering New Zealand’s background in multi skin yachts like those made by Logan and Bailey, and with the developments made in dinghies it wasn’t much of a stretch to larger multi skin glued planked boats, keelers, launches and commercial boats.  

    Hulls were typically built upside down, onto bulkheads, frames and stringers, or on a stringered mould. The stringered method echoed the way aircraft were built. The same care was taken in timber selection as for traditional boats except that many components were commonly laminated (glued together) from layers to build up to the finished sizes, and to enable curved shapes to be formed by gluing them around jigs. For example, laminated hull frames.

    Framing

    Hull frameworks typically consisted of timber internal keel back bone, wooden stem and stern and timber floors through the bottom and timber engine bearers. Plywood bulkheads were glued alongside frames. Laminated timber frames were often used on yachts especially with multiple layers of timber glued and clamped for round bilge boats.

    Frames were made on the floor from the lofted sections and braced with cross spawls and legs before standing up, then stringers were fitted. These boats were mechanically fastened by screws, bolts and rivets as well as glued but reliance on fastenings was lessened with the glue spreading the loads all over the component faying surfaces rather than pulling on a series of pins(nails/screws/bolts) like traditional vessels. 

    Transverse frames and bulkheads were spaced sufficiently to provide good support for longitudinal stringers spaced at around 100mm apart.

    Planking

    For launches plywood was often used in the aft sections and diagonally laid fwd. Solid timber diagonals were mainly used on round bilge vessels but also on chine vessels of about 6-10mm thickness.

    Diagonal (cold moulded) planking was typically double diagonal (2 skin) on boats up to a maximum of about 12m and triple (3 skin) diagonal on larger craft. It isn’t possible to tell definitively without taking a core sample if a hull is 2 or 3 skin. 3 skin was generally agreed to be significantly stronger than 2 skin for the same overall thickness. Some used 4 or more skins for extra strength, thickness or for bigger boats.

    Fastening and glue combinations

    Fastenings were required to back up the glue in some areas to prevent cracking alongside glue lines and to hold the glue join until it cured. Planking was typically nailed into stringers with copper nails mainly to hold the planking against the stringers until the glue cured. High and even clamping pressure was required with the resorcinol glue that was used, and rows of nails along stringers can usually be seen on cold mornings or where there has been water ingress or on dark coloured hulls.  

    For commercial glued wooden boats the recommended fastening nails and spacing were specified in the Requirements for the Construction of Wooden Inshore Fishing Boats ,1972 the effort to publish the guidelines including plywood indicates the uptake of glued timber by 1972 was significant.

    Resorcinol glue was used until epoxy acceptance (initially with Epiglass’ “Epiglue” began to take from around the mid 1970s). Resorcinol is an excellent glue for wood-to-wood gluing and laminating – in my opinion still superior to epoxy for laminated frames and for slightly damp timber and possibly for treated timber. And it is still used for marine plywoods. It is far stronger than the timber it glues but must be applied to both surfaces and clamped evenly and tightly to form a good bond. It is also not a gap filling glue so all joins had to be a perfect fit.

    Glued vessels scantling sizes and skin thicknesses can be reduced compared to traditional timber vessels because of the improved glued connection of the components such as multi layers glued together preventing splitting and cupping that would occur with single layer timber.

    Glued construction provided greater structural stability and hull/deck structures were no longer subject to the leaks or movement that was normal on timber vessels. However older non glassed vessels sometimes move around nails along stringers that tends to allow moisture ingress and hulls becoming wet.    

    Hulls were increasingly sheathed with an epoxy saturated reinforcement skin. And most hulls were at least sealed with a thinned epoxy like Epiglass’ “Everdure”before painting. The approach was to keep all water out of the structure – although this was not always the reality. 

    The 1960s saw rapid development in glued construction, using plywood and diagonal planking with many vessels made by DIY builders. Legendary designers such as Hartley, Jim Young, Pelin, Augustin, Spencer, Alan Wright, and others produced multiple designs built by amateur and professional builders. There was a tendency for many builders to put their own mark on designs, and although most vessels were effectively custom built, there was a move towards efficiency with kitsets and templates sometimes available for popular designs. With the kiwi spirit alive and well this didn’t stop sisterships sometimes turning out to be quite different when built by different builders from the same plans.

    About plywood
    Marine plywood is often misunderstood in boatbuilding. Its introduction revolutionised boatbuilding with one of its most ardent champions John Spencer known as “the Plywood King” due to his evangelical enthusiasm of the material.  It quickly became and remains in many applications, the go-to material for areas where strong relatively durable sheet material is required including bulkheads for almost all boats, decks of almost all glued timber boats (some with teak overlay), hulls of hard chine dinghies and yachts and launches and even for production GRP (fibreglass vessels) and deservedly so.

    In the 1970s marine plywood may have been made in New Zealand, usually comprised of durable species for all layers, in some cases believed to be from New Zealand Kauri. This was glued with resorcinol glue as it is now. The early plywood definitely seems to have stood the test of time well compared to more recent BS1088 marine plywood made from tropical timbers like Meranti or Okume Gaboon.

    Despite the “marine” description the durability of BS1088 plywood made from tropical timbers can be variable. The timbers used are non treated and the BS1088 standard does not refer to durability, it is related to allowable voids and gluing standards. The glue is usually resorcinol, and the bonds are better than epoxy, boil proof and not generally liable to failure, even when wet. However, the plywood’s BS1088 standard may not have been independently quality assured for consistency. Unfortunately, decay is not uncommon. It usually occurs where freshwater finds entry into the plywood such as via deck penetrations like screws or bolts, around windows, cockpit lockers etc.

    As with all timbers, if the timber, plywood or not, is not durable (such as sapwood, non durable species), and if the moisture content is allowed to reach a certain level – over 20%, and if there is no ventilation but there is oxygen, decay is likely (saltwater is less of a problem in planking as it tends to pickle timber). One of the main disadvantages of fully sealed, non treated timber is that if water gets in, it will not evaporate or dry out easily.

    Furthermore, inferior “marine bonded” plywood was often sold alongside BS1088 without the BS1088 stamp, without quality assurance. Of course this was typically about 25% cheaper. Same plywood sheet outer faces, same bonding. What could go wrong?

    Wooden boatbuilders exposed to the new BS1088 plywood through repair work, especially the tropical timbers, were aware of the limitations.
    To guard against decay it was/is common to use treated pine made for the construction industry for key structural at risk panels. For example under teak decks and for paneled bulkheads. Treated pine construction plywood, while having rougher face grain and surface, has proven durable over time.     

    Early epoxies  and sheathing

    By the 1970s fibre sheathing of timber was being used such as “dynel” an abrasive resistant fabric that soaked up a lot of resin, and glass fibre. The epoxies in the 1970s were mainly Epiglass products such as: a white resin called something like Rapid 90 laminating resin for fibreglass, Epiglue epoxy glue paste, Epifill epoxy filler paste (filler that was really dense and very hard to sand), and Everdure sealer (that contained toxic preservatives that are no longer included).

    The epoxy glass sheathed laminated timber hulls made from these products were a far cry from their timber ancestors in terms of finish, likely longevity, dryness, weight and strength.

    New paint systems

    The glued and sheathed vessels were very stable and not subject to movement like that experienced on traditional planked vessels. Hull and deck surface stability was compatible with the new hard “two pack” marine paints which became available around the late 1970s, such as the high tech product of the time known as Epiglass Reaction Lacquer.

    Two pack marine paints are more than a tough, hard protective coating. A good system applied correctly by a skilled applicator will not only last but retain a fine near perfect finish with requiring only an occasional polish. This is a preferable coating than the more porous gelcoat used on GRP vessels due to superior waterproofing and lack of porosity.

    Movement showing in finish

    One of the main features and advantages of multi skin glued constructions, especially kauri, is structural stability. 

    Any hull movement is usually very slight only able to be seen in certain lights or early in the morning where condensation often forms on the nail rows of stringers or vessels painted dark colours that will move slightly more due to the hotter temperatures of their structures.

    Blemish/defects can occur on glued timber hulls and decks such as:

    • glass sheathing fibre “print through”,
    • Unusual/inconsistent movement that can be felt by fingers and nail depression into the timber clearly visible.
    • Exposure to sun continuously on one side of the vessel (such as in a marina).
    • It is possible that movement can originate from the build stage where a partially finished vessel may have had water ponding in the bilge or gluing and painting may have been carried out in very moist conditions, or the boat may have taken many years to build so moisture can be locked in and cause movement as it tries to dry out when exposed to the elements.
    • unventilated lockers that border the inner hull with external hull movement only in the region of the lockers
    • ingress around chainplates travelling down into the planking and decking
    • ingress via decks into top of planking
    • window, hatches or belting penetrations
    • Rogue sections of non-durable timber like sapwood – accidentally used during the build, repairs or upgrades
    • trapped/ponding internal moisture causing external movement or softness such as in sealed voids, inside plywood radar archways, in flying bridge coamings and cockpit box coamings, in leaking lockers with water ponding

    Although it is not really a surveyor’s job to guess at the story of what might have happened when defects are found in survey/inspections, these types of issues should be noted as observations. And it is good for the surveyor to understand the potential causes as they can potentially lead to discovery of related issues.

    Evolutions of 3 skin diagonal timber hulls

    Occasionally glued timber hulls were built using a single skin of glued strip planking with or without glass sheathing externally. This provided a smooth inner surface for water to drain freely to the bilge without becoming trapped by stringers. But there is a higher potential for single skin strip planked glued hulls the same thickness as diagonal hulls to split. A heavier external glass skin instead of diagonals is a viable option to provide extra backing to the longitudinal grain.

    However, another approach from around the early to mid 1980s was to use an inner strip planked skin followed by two or more diagonals. This provided a smooth inside planking without a planking split risk and relatively wide frame spacings could be used instead of stringers.

    Other new developments also emerged in the early 1980s that were more significant,

    1. the widespread use of West System Epoxy (and later in the 1980s competitor products such as East system, and Epiglass HT9000 and others
    2. strip planked cedar core boats.
    3. Engineered boat structures and laminates

    The West System epoxy was designed for use with timber and resin fibre reinforcements. The base resin and hardener could be easily dispensed and mixed aided by proprietary mixing pumps and was used for laminating glass fibres and brushing resin. Additives known as “extenders” enabled resin to be thickened into filler or adhesive or both by the addition of the appropriate “extender” powder/s (such as silica or microbaloons or talc and many others). This was a big step and a whole new system of epoxy boatbuilding.

    The West System mantra was all about keeping water out of the timber and encapsulating the boat structures with epoxy. Generally, hulls and decks were glassed over with a sheathing cloth of about 200g box weave (0/90 deg) using epoxy resin. Then the glassing was coated with extra resin or a slurry of thickened resin to fill in the weave, followed by fairing to bring the surface to be ready for an epoxy primer or a marine paint system.

    If the structure was properly encapsulated, then water could not enter and if water could not enter the wood could not get wet and if the wood could not get wet it did not need to be durable. This was good in theory but not quite always 100%. Holes were to be plugged with filler then re drilled and/or various other techniques were advertised to maintain the integrity of the system. This approach was a step further than applying Everdure to keep the wood dry.

    While West System and wood epoxy in my opinion really did prove to be a revelation, there are still many places and situations where water has passed the epoxy barrier. For example when, in the rush to complete a vessel, holes are drilled for deck fittings and sealant is relied on to seal fittings. When a fitting moves the seal is broken and water can seep into the timber (think cleats). Durable materials are still required.

    Strip planked cedar

    Widespread take up of strip planked cedar planking proved to be a big step forward from about the mid 1980s. Using the new epoxy methods strip planked cedar – a fraction of the weight of kauri – was used as a hull planking material and was far faster to build.

    But cedar was too soft to be used without a thicker than normal sheathing. Fibres such as Kevlar and directional woven glass fibres were used to provide a hard structural supplement to the cedar’s properties.

    Initially, (around the early 1980s) strip planked cedar boats tended to be built with slight trepidation, on a backbone like on a multi skin boat but with a thin barely structural internal skin and a thick external skin strengthened with Kevlar below the waterline.

    This approach changed with the introduction of more scientific approaches to structural design.  

    The science

    Following the introduction of advanced products by Epiglass and West System; Around the 1980s High Modulus (now Gurit) began supplying advanced fibres and core materials and composite engineering advice. Run by mechanical engineering graduates of the University of Auckland’s Engineering School, High Modulus’ engineers worked with boat designers – most who were boatbuilders rather than Naval Architects, to provide engineered laminate specifications for their designs. High Modulus also supplied the reinforcements that they specified to the builders.

    Another company, Adhesive Technologies, run by chemists represented West System Epoxy and suppled resins and advise on specialist epoxies and vinylester resins to use in conjunction with the newer engineered fibres. Mostly, the wood epoxy boats used the West System.

    Resorcinol use faded away in the early 1980s as epoxy’s far greater versatility, less stringent application advantages and similar price took over. While resorcinol remained an excellent glue for wood to wood gluing and is still used for gluing plywoods, its superior strength was not required as wood was weaker than epoxy as well. In many cases glue strength only needed to be compatible with wood not excessively stronger. Similar density was better and microbaloons enabled easy cleaning off of strip planked cedar – faster and better.

    Wood core

    Progressively but quickly over the 1980s the internal keels(hogs), stem and backbone structures from strip planked cedar boats disappeared as the inner skin of the cedar strip boats increased in thickness with decreasing internal structure and more strength in the skin – specified by High Modulus or other engineers.

    With the reduced structure hulls were built predominately on temporary MDF or particle board frames. Towards the end of the1980s designers began providing computer cut frames, output from the yacht design and CAD software to builders.

    Wood, glassed over tended to be retained for mast steps, keel floors and high load areas. It was common for some kauri or similar timber to be used in the top hull planks and keel area hull planking.

    Laminated frames gave way to foam/glass engineered ring frames and bulkheads were glass taped in position.

    Full transition

    These hulls were now, if painted, indistinguishable from a foam or end grain balsa core composite with no mechanical fastenings or indicators of them being a wooden boat at all. The only differences would be that the fibre skin laminate specification could be designed to allow for the strength of the fore/aft grain of the cedar compared to a core that has minimal and equal directional strength like end grain balsa or closed cell PVC foam like Kledgecell, Divinycell or Airex. And for practical purposes the outer skin on a hull with an 80kgm3 core density may need to thicker to prevent denting than cedar with a density of around 320kgm3.

    Decks

    Sheathing using early epoxy and box weave glass fibre became the norm on hulls and decks that were not overlaid with teak. Teak decks screwed over plywood with black caulking between the seams came into vogue around the late 1970s and has proven to be one of the main issues found on vessels from that era. Teak is soft and wears easily, the overlays were relatively thin. Over time teak decks have often been an issue due to ingress into plywood and glassed painted borders from the fastenings and seams as they degrade.

    Decks on glued timber boats were typically made from glued timber in the form of plywood sheet, sometimes from multi layers where a lot of deck camber or other curved shape was required. Some decks were made as ply/balsa/ply of ply/foam/ply glassed which produced a smooth interior surface with no beams.

    Cabin coamings could be either plywood, timber or timber with a plywood backing to prevent splitting. Decks and coamings were mostly epoxy and glass sheathed typically using 200gsm cloth. The cloth provides some abrasion resistance if paint wears through and also carries/bulks out the relatively thin layer of epoxy resin.

    The epoxy saturated glass sheathing over plywood prevents plywood veneers (peeled off logs rather than being sawn) from “checking” as checking in the plywood provides a pathway for water to get in.

    Sometimes unusual hammer tap soundings in certain areas when surveyed can indicate other constructions such as:

    • rounded shapes often used cedar or other light wood strip planking or diagonal or foam cores with glass both sides.
    • Sometimes thin plywood skins were used either side of foam or balsa with glass fibre skins.

    It is worth considering these sometimes-unexpected construction details when encountering softness in decks in strange areas that could be due to the use of foam or similar cores.

    Through the 1990s to the present, wooden hulls

    Over the 1990s the wood epoxy construction boom slowed down. However, a few  professional builders have maintained good businesses building semi-custom vessels. Evolutions of existing vessels which enables the scope and cost to be accurately defined such as the Upfold Elite launches are an example.

    There is also a good market for repairs and alterations using wood epoxy – often with glass reinforcements, although the cost of labour and overheads is a barrier and many owners of wooden boats of all types cannot afford to get repairs done.

    Occasional one-off vessels are still built but custom vessels in general are at the time of writing rarely built, mainly limited to export vessels for wealthy international owners with very specific needs and deep pockets.

    Production built GRP vessels now dominate in new boat sales of all sizes. Most larger non trailerable vessels are imported.

    Older glued timber vessels present good value but most being well over 20 years old now are due for refits to bring them to fully serviceable, including paint and often engines. This is not always the case. Continuously maintained vessels are sometimes found that are as good as new.

    The hulls of most glued timber vessels that I see are usually pretty good – but there have been significant exceptions. As general types, triple skin kauri and strip planked cedar hulls are both in my opinion as good as each other.

    The issues tend to lie in the decks, repainting being due, and a myriad of other deterioration as to be expected for vessels over time. The older and less valuable the vessel, the less owners are inclined to spend.

  • ABOUT WOODEN BOATS 1

    ABOUT WOODEN BOATS 1

    Part 1 – Traditional wooden boats

    By Paul Stock

    This article is part 1 of 2 parts.

    Welcome to this condensed summary of the history of New Zealand wooden boat structures in New Zealand (close to the actual truth but it is acknowledged that there may be some who see things differently and that is fine).

    It is intended for anyone interested in wooden boats, especially surveyors and owners intending buying one.

    Let’s get started. Which of the following statements is true?

    • Wooden boats hulls tend to move slightly (bend/twist/expand/contract) that causes the planking joins to be visible
    • Wooden boats need a lot of maintenance
    • Wooden boats rot
    • Wooden boats shouldn’t be painted with hard marine paints
    • A wooden boat is a boat made of wood.

    I would say that the only the last statement is true. The answer to the others is: it depends. That’s because there are many structural ways to build a wooden boat.

    The number of wood boats of any kind being built is reducing along with the boatbuilders who build or have built them. As knowledge fades so does good available information about the boats for those keen on buying, using, preserving them or for younger boatbuilders and surveyors tasked with assessing or repairing these boats.

    Wooden boat types can be divided into four broad categories. Most wooden boats will fit – more or less – into one of the following:

    • Traditional vessels such as Pacific fishing and voyaging craft (outside of scope for this article but we’d like to do an article on these fascinating craft in future).
    • Traditional construction without glue
    • Glued wooden construction
    • Glued and encapsulated wooden construction (a form of composite construction)

    Traditional wood construction without glue

    These vessels are most boats built in New Zealand up till the mid 1900s (say late 1950s).

    It is useful to know a bit about these now virtually archaic boats to understand the evolution of wooden vessel constructions. Traditional wooden boats formed the foundation for evolution to glued timber, then to epoxy sheathed and eventually composite timber cored vessels. What follows I hope explains the quantum differences between the different wooden boats. What is normal in terms of maintenance, longevity, weight, finish on a traditional vessel is very different to normal on a glued wooden epoxy encapsulated vessel.

    There are very few new traditionally built vessels launched these days, but there are the occasional exceptions such as a new 14.5m traditionally built fishing trawler that was launched by Stark Bros. in Lyttleton in 2021. 

    Traditional planking

    Planking was mainly fore and aft oriented single skin planked although some were built using multi skin including diagonals sometimes with felt between the layers and combinations of longitudinal and diagonal planking were not uncommon. The late 1800s and early 1900s pleasure sailing vessels by Logan and Bailey were often built this way and I’d say that they would have been stronger and more durable for a given planking thickness but also more time intensive and expensive to build.   

    Kauri was the most often timber used for planking in New Zealand but many other softer and harder straight grain timbers have been used.

    Planking type can be:

    • Carvel; caulked or tight seam or with seam battens or splined,
    • Multi skin with combinations of diagonals and longitudinal planking
    • Clinker (overlapping like weather boards, mostly used for dinghies) 

    Hull component sizes and shapes were determined by “lofting” the process of re drawing the hull lines full size and by reference to a list of scantlings provided by the designer. Scantlings specify the siding and mouldings (width and height) of each part.

    Structural requirements and scantlings

    Scantling sizes would often be determined by the boatbuilders from experience, especially for pleasure vessels. As there were many more small fishing boats around the coast than there are now with most probably wooden, the Marine Department of New Zealand published “Requirements for the Construction of Wooden Inshore Fishing Boats” which included guidelines for construction and tables of required scantlings sizes for fishing boats 6-14m.

    Lofting

    With the lofted information, the builder was able to build the backbone, consisting of the keel – (sometimes including the bolted ballast if a sailing yacht) and the stem, stern post and stern.

    One reason for lofting was to correct any discrepancies on the drawing. For example, a 0.5mm variation on the drawing at a scale of 1:50 would be 50 x 0.5mm which is 25mm in full size. Using battens wrapped around temporary nails tapped into the lofting floor at or near the designer supplied offsets, the waterlines, buttock lines, diagonal lines and sections were reproduced full size on a white painted floor so that all the lines were “fair”.

    The second reason for lofting was so planking thickness deductions and bevels could be determined and applied to vessel components as required for frames bulkheads, stem, stern, and bevels for the rabbet lines (where the first plank joins the keel) etc.

    One of the pinnacle skills of the craft of lofting that apprentices used to be tested on in New Zealand as recently as the early 2000s was manually, on the loft floor “develop” full size the shape and edge bevels of a raked and curved transom (stern).

    Lofting skills are still used on glued timber vessels but to a much lesser extent as computerisation takes over and the conventions and terminology of traditional boatbuilding fade away.

    Building process

    Hulls were mainly built upright but there was a lot of innovation in New Zealand and there wasn’t “a” definitive way.

    Usually, at least for carvel construction, the backbone/keel was laid on blocks, the hull moulds/frames were set up on the backbone typically braced to the boatshed roof structure. 

    Planking was then laid over the moulds and fastened using fasteners such as copper nails, roves, bolts and bronze screws. Iron fastenings were also sometimes used – especially for boats that may not have been expected to last that long – more likely on commercial. Planking would typically need to be steamed in the steam box to soften it up to bend around the hull. The timber would be left in the steam box until about right, then pulled out with gloves on and, no doubt with a degree of urgency, wrapped around and secured in position before it started to set in the bent shape.

    Planking was typically followed by ribbing which again involved steaming and nailing/riveting of the ribs inside the hull before the timber cooled down and set. The ribs held the planks together. Temporary stringers (ribbands) could also be used over the temporary moulds to form steam bent frames.

    After planking, the remainder of hull framing, bulkheads, gunwales, knees, engine bearers and mast steps, floors, deck framing/deck and interiors etc. were fitted.

    Fastening and metals connected to planking and structural timbers

    The fastenings on these vessels were crucial. Without nails, bolts and screws the planking will come apart.

    Some of the issues found on aged vessels related to fastenings include “nail sickness” that degrades wood surrounding fastenings.  The salt saturated wood reacts with the fastenings to cause a type of electro chemical timber degradation. Electrochemical type degradation is also sometimes seen around fittings such as stern and rudder glands that are surrounded by wet salt saturated timer.

    Any kind of “bonding” together of metal fittings using conductors (wire or strap), especially bonding of dissimilar metals for electrical or cathodic purposes tends to cause electrochemical activity around metal fittings that can quite possibly cause degradation and damage to the timber surrounding the bonded metal fittings. Anodic metals are also very vulnerable.

    The impact on timber of bonded metal fittings can be very significant, stripping the cellulose and strength completely out of the timber. From a structural perspective it is best not to bond metal fittings on wooden or GRP boats (all wooden boats as the wood core on composite wood boats can get wet around glands etc. despite good intentions of it staying dry forever).

    Metals should be very durable so that they do not need to be cathodically protected such as good bronzes like silicone bronzes, copper, and monel (rarely seen now but good).  Copper can stretch and while a noble metal, its condition can be difficult to assess when aged.

    Hull tightness

    When new, traditional boats were generally “tight”. Carvel planked planking seams were  caulked with cotton. Nail heads tightly embedded in the timber.  Cotton wrapped around the bolt heads helped seal them. Any moisture absorbed by the dry planking would swell the timber causing “take up” of the planking to make the hull tight (although traditional shaft and rudder glands are supposed to drip so a dry bilge is hard to achieve).

    Carvel hull finish

    When carvel planked hulls are new and have been cleaned off and faired, slight surface variation usually gives away the planking seams visibly. As they age, it’s normal for movement of planking to become visible, more so above the waterline. Heavily built vessels and commercial hardwood planked vessels are less subject to movement and dark coloured hulls more likely to move more than light.

    Flexible single pot (air drying) oil paint is generally used to paint hulls with repaint caried out relatively frequently, often by brush/roller.


    Timber selection and properties

    Timbers were selected to match the component’s structural requirements. Many different timbers species were used, like: Spotted Gum, Tanekaha and similar type harder woods were used for ribs and bent frames. Pohutukawa was a good choice for knees, especially as the gnarly shapes could often be matched to the required grain direction curving around the knee (known as grown knees). Kauri was the preferred choice for durable straight grain beams, decking framing and general light/strong/durable applications. In fact, kauri was so versatile it wasn’t uncommon for almost all timber on a vessel to be kauri.

    As structural timbers on these boats were often exposed to unrelenting wet conditions over the lifespan of the vessel, durability was a key attribute. Generally, only heartwood was used but perhaps not the deep heart which would be likely to be more brittle than mid heart. Tanalising treatments became available after the main carvel planked era so previously non-durable woods like pine can sometimes be used for repairs.

    Timber properties can be partly predicted based on the species, parts of the tree that the timber is from (such as sap and heartwoods), and grain direction in relation to the face (1/4 sawn or flat sawn). In non-laminated timber there is a significant difference in tendency for timber to warp, twist or cup based on how the logs have been cut. Quarter sawn timber is far superior and more expensive (areas where quarter sawn would be used include decking and planking). The way the timber is sawn is much less important in glued timber as when several layers are glued the grain of pieces can be arranged to negate movement.

    Dry timber is stiffer and likely stronger than wet timber and timber is by nature inconsistent. Timber in large scantling sizes can exert great power if it gets wet and swells. 

    Worm and airborne boring insects

    Another important consideration that still applies to modern timber constructions is worm found in the sea such as toredo worm (big holes) and gribble holes (little holes). These worms can be damaging. You can see worm holes on pieces of drift wood and unprotected timber in the sea. And it often gets in to the keel battens on the bottom of older launches keels. These worms can get started in any craters in hull planking and it is important to keep the protective coating in good condition as many traditional boats are often only protected with antifouling. Some timber species are more resistant to worm than others.

    Airborne insects such as borer and termites can also get into timber and termites sometimes find their way into boats in the tropics but there have also had cases of termite damage to planking on overseas cruising boats. Small holes in timber and dust-like residue near the holes known as frass can be indicative of termites carried into New Zealand. Borer isn’t common in boats but could be in timber used to build a boat.   

    Degradation of traditional timber hulls

    Structural degradation factors include:

    • Fastening heads pulling into the timber with the vessel’s movement during use,
    • Moisture ingress and timber expansion and contraction from heating and cooling.
    • Copper stretching.
    • Nail sickness and electrochemical decay as mentioned previously,
    • Hull sides may also dry out with exposure to sun and heat especially if kept on a marina where one side is north facing all the time or hauled out of the water.
    • Worm or airborne insect damage
    • Abrasion and impact damage – such as commercial boats

    The more the vessel moves over time, the looser fastenings and planking become. Boats become wetter – in the bilge and structure, movement increases. If hauled out and allowed to dry, it is not unusual for them to sink when re launched!

    With additional movement some structural timbers become more liable to break, such as ribs on the turn of the bilge where they have been steam bent into shape and the amount of curvature is greatest. If there is unexplained planking movement, always check for broken ribs internally. If one rib breaks, others adjacent will be more likely to break too. Ribs can be “sistered” (extra ribs fitted alongside existing) and refastening or tightening of fastenings can help.

    Eventually, carvel vessels are likely to become too wet, with too much movement to the extent that cost of repair exceeds vessel value. These vessels are often abandoned, left languishing on moorings or on the hard, on the side of roads or in boat yards. 

    Degradation of decks

    Planked and caulked bare decks wear down over the years. Water fresh and raw (sea or lake) tends to find its way through planked decking and sometimes into the upper hull planking and deck framing. Sometimes plywood is laid over the decks to prevent wear and prevent/reduce deck leaks.

    Timber decay (rot) is not unlikely from deck leaks – usually in areas where fresh water saturation in deck areas or their framing may have occurred.

    Ways to extend the life of traditional timber vessels

    There are ways that the effects of degradation can be reversed or mitigated. The following options may be used but need to be considered carefully in each case:

    • Restricting the vessels operating area/risk.
    • Overlaying worn decking with tanalised plywood.
    • Filling in the seams and glassing over teak overlay decks that are well bonded but worn 
    • Recaulking with cotton or oakum caulking for really big gaps. Caulking is done using caulking irons and caulking mallet. Some success can be had using sealants but if possible, it is often best to use traditional methods on traditional craft.
    • Major surgery of the hull can be achieved by drying out completely and gluing a couple of diagonals of timber over the hull followed by a GRP sheathing, or simply very heavily glass fibre sheathing the vessel to create a GRP shell outside of the existing hull. Diagonals first is preferred as a connector between the potentially damp aged existing planking and the hard fibre reinforced resin. A moisture tolerant glue such as resorcinol is more likely to adhere to damp timber than epoxy that is moisture intolerant.  

    These remediations can be expensive but are sometimes justified for particularly special vessels.

    The time it takes for degradation to occur varies widely. Sturdy commercial vessels can last a very long time. Although they work hard, they were originally built strong and heavy sometimes with timbers like Australian hardwoods. These commercial vessels have also had to be maintained to a specified survey level and tend to be kept going to the maximum of their safe working life in order to maximise the economic return to their owners.

    Traditionally built wooden commercial and pleasure boats have provided and continue to provide many owners long commercial or recreational service lives.

  • USING STAINLESS STEEL FOR KEEL BOLTS

    USING STAINLESS STEEL FOR KEEL BOLTS

    See this blog from ANZOR Australia for a succinct explanation of stainless steel use for keelbolts. It also applies to use of stainless steel generally in saltwater.

    https://www.anzor.com.au/blog/keel-bolts

  • NZ HYDROGRAPHIC OFFICE S-63 ELECTRONIC CHARTS

    The New Zealand Hydrographic Authority (NZHA), located within Land Information New Zealand develops the official NZHA charts used in New Zealand. Electronic versions of the paper charts are available from the NZ Mariner service free of charge. They are electronic scans of the paper charts. They can be used on compatible software and are updated regularly. However LINZ has advised that the NZ Mariner service will be withdrawn soon and replaced with S-63 ENC charts.

    The replacement ENC charts are updated fortnightly. This is a great service. It is feasible to have a full catalogue of the official NZ charts for the areas required kept on your vessel’s computer or a laptop.

    The NZ ENC has a dedicated website https://www.encservice.linz.govt.nz/

    The ENC charts require compatible software or hardware to run. They work well on small sailing craft in conjunction with an on-deck plotter running one of the proprietary charting solutions that come preloaded, as an ap or on an SD card.

    The ENC system can be used on a PC or MAC interfaced with onboard electronics as the solution for primary information. Examples of use for the ENC charts include information on restricted areas, anchoring restrictions, AIS marked features, course planning, routing, yacht racing, AIS overlay, possibly radar and other electronic features. The on deck system is the one to use for immediate navigation, consisting of a waterproof plotter, or IPAD/Tablet with proprietary CMAP/Navionics type charting.

    To run the ENC charts you need to obtain permits but these are either not expensive or free (LINZ). You get them from the charting software vendor and LINZ. Figure this out by following the LINZ and charting software provider instructions carefully.

    Free software options include qtVlm or Open CPN. Paid software that will run it includes Expedition. The software will often also allow you to use other types of charts to such as third party or the raster charts that are being phased out in New Zealand.

    A good source of information that should answer most questions is David Burch and you can find his blog here

  • PRE PURCHASE BOAT INSPECTIONS (SURVEYS)

    PRE PURCHASE BOAT INSPECTIONS (SURVEYS)

    The basics of how it works in New Zealand

    If you want to buy a second hand boat we recommend that you get a survey (meaning boat inspection) done by a good surveyor who is independent of the seller or broker. Problems found after the deal is finalised can damage your bank account and spoil the fun of the boating. On the other hand if your survey or other advisors identify the issues you can negotiate or walk away if it’s a lemon.

    Boats over 30 years old will usually require a survey for insurance purposes. You’ll need insurance to be accepted to rent a marina berth and possibly a mooring or to be hauled out at a boat yard.

    You can either buy a boat privately (seller sells directly to buyer) or using a broker.

    Brokers operate in the same way as real estate agents where the seller pays them a commission if they sell the boat. Brokers will almost always insist that you get a survey so that you are aware of any deficiencies and also so that they are not liable for them.

    If you use a broker they will negotiate on behalf of the seller to get a deal acceptable to buyer and seller. The normal process is to make a deal conditional on structural survey which includes out of water internal, deck inspection and essential component checks, engine check, rig check in some cases if a yacht, and sea trial.

    The structural surveyor does the hull and structure and external machinery inspection. A mechanic/engineer does the running condition of the engine. A rigger does the rig check aloft if required. A time frame is put on fulfilling these requirements and it’s a good idea to allow a little extra time to get the checks done as organising the surveyors, boatyards and other logistics can sometimes take longer than expected.

    The deal becomes unconditional when you agree the conditions have been met to your satisfaction. Some deals have clauses to make it hard to get out of a deal such as that there must be substantial deficiencies. The surveyor’s report is typically used to quantify the deficiencies and it is common for there to be price reductions to alloy a buyer to have deficiencies remediated or for the seller to agree to repair the deficiencies. The broker negotiates these things.

    Many people buy privately. A good approach is to use a written agreement between buyer and seller and work through the above processes of survey/checks directly between buyer and seller.

    Regardless of what happens you will be in for a journey when you buy a boat. We hope it’s a good one.